If you are reading this, then you probably know that the minimOSD is the standard on screen display for the APM Arducopter or APM Arduplane. They tiny boards come with a software version that is likely outdated and has a poor layout. To fix this and upgrade the firmware to EXTRA read on:
- Buy a USB to TTL(3.3v) cable. 6 pin cables are easier to use but harder to find and they cost more than 4 pin cables. 4 pin will work, however if you use a 4 pin cable: every time you read or write to the OSD you will have to momentarily press the reset button 1 second before reading or writing. If you don’t press reset you will get an error. “failed to talk to boot loader”, Not a big deal… if you know beforehand. This 4 pin cable is only $6.99 on Amazon Prime.
- Plug the cable into your PC, let it load its driver. Win7 is supported, if you use Win8 then use this $20 6 pin cable: Pay attention to when it installs, in the taskbar it will mention what COM port it uses, mine was COM 5.
- Connect the 4 pin cable to the OSD as follows: black to GND, red to +5V, green to RX, white to TX. If it fails to connect in the next step; swap the green and white.
- Download the latest CT program and HEX file from the Extra Google Code site. Extract the CT files to a folder.
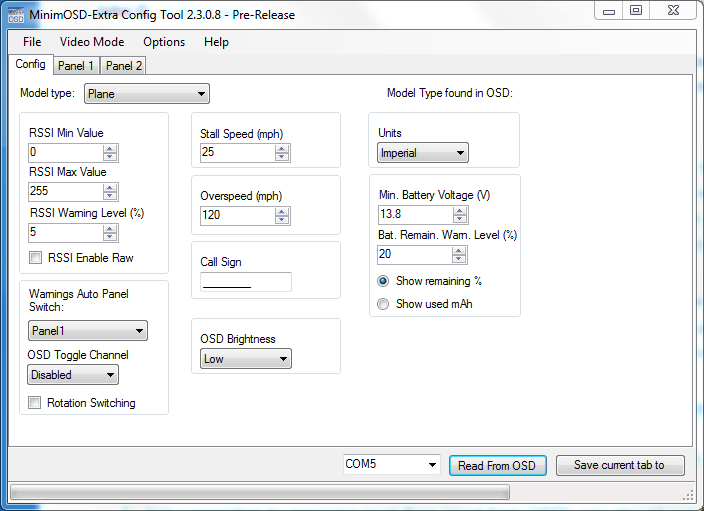
- double click on OSD_Config.exe, the GUI will open.
- The app is fairly intuitive. Be sure to press the reset button on the OSD 1 second before you press “read from OSD” or “Save current tab to” or updating firmware.
- Select COM port.
- Test connection by pressing reset then “read from OSD”, you should see the data propagate.
- Firmware (HEX) update is available from the tab on top, be very quick with the reset button or it will error out.
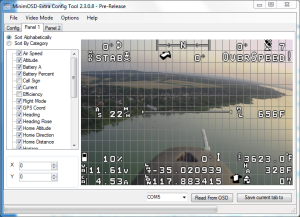
- After firmware update then press read again, then TAB over to Panel 1 and select options and customize OSD items. When done customizing click “save current tab to”.
- update char set, use “latest” char set file located in the OSD config utility folder.
- reboot, test, done.